Finished product
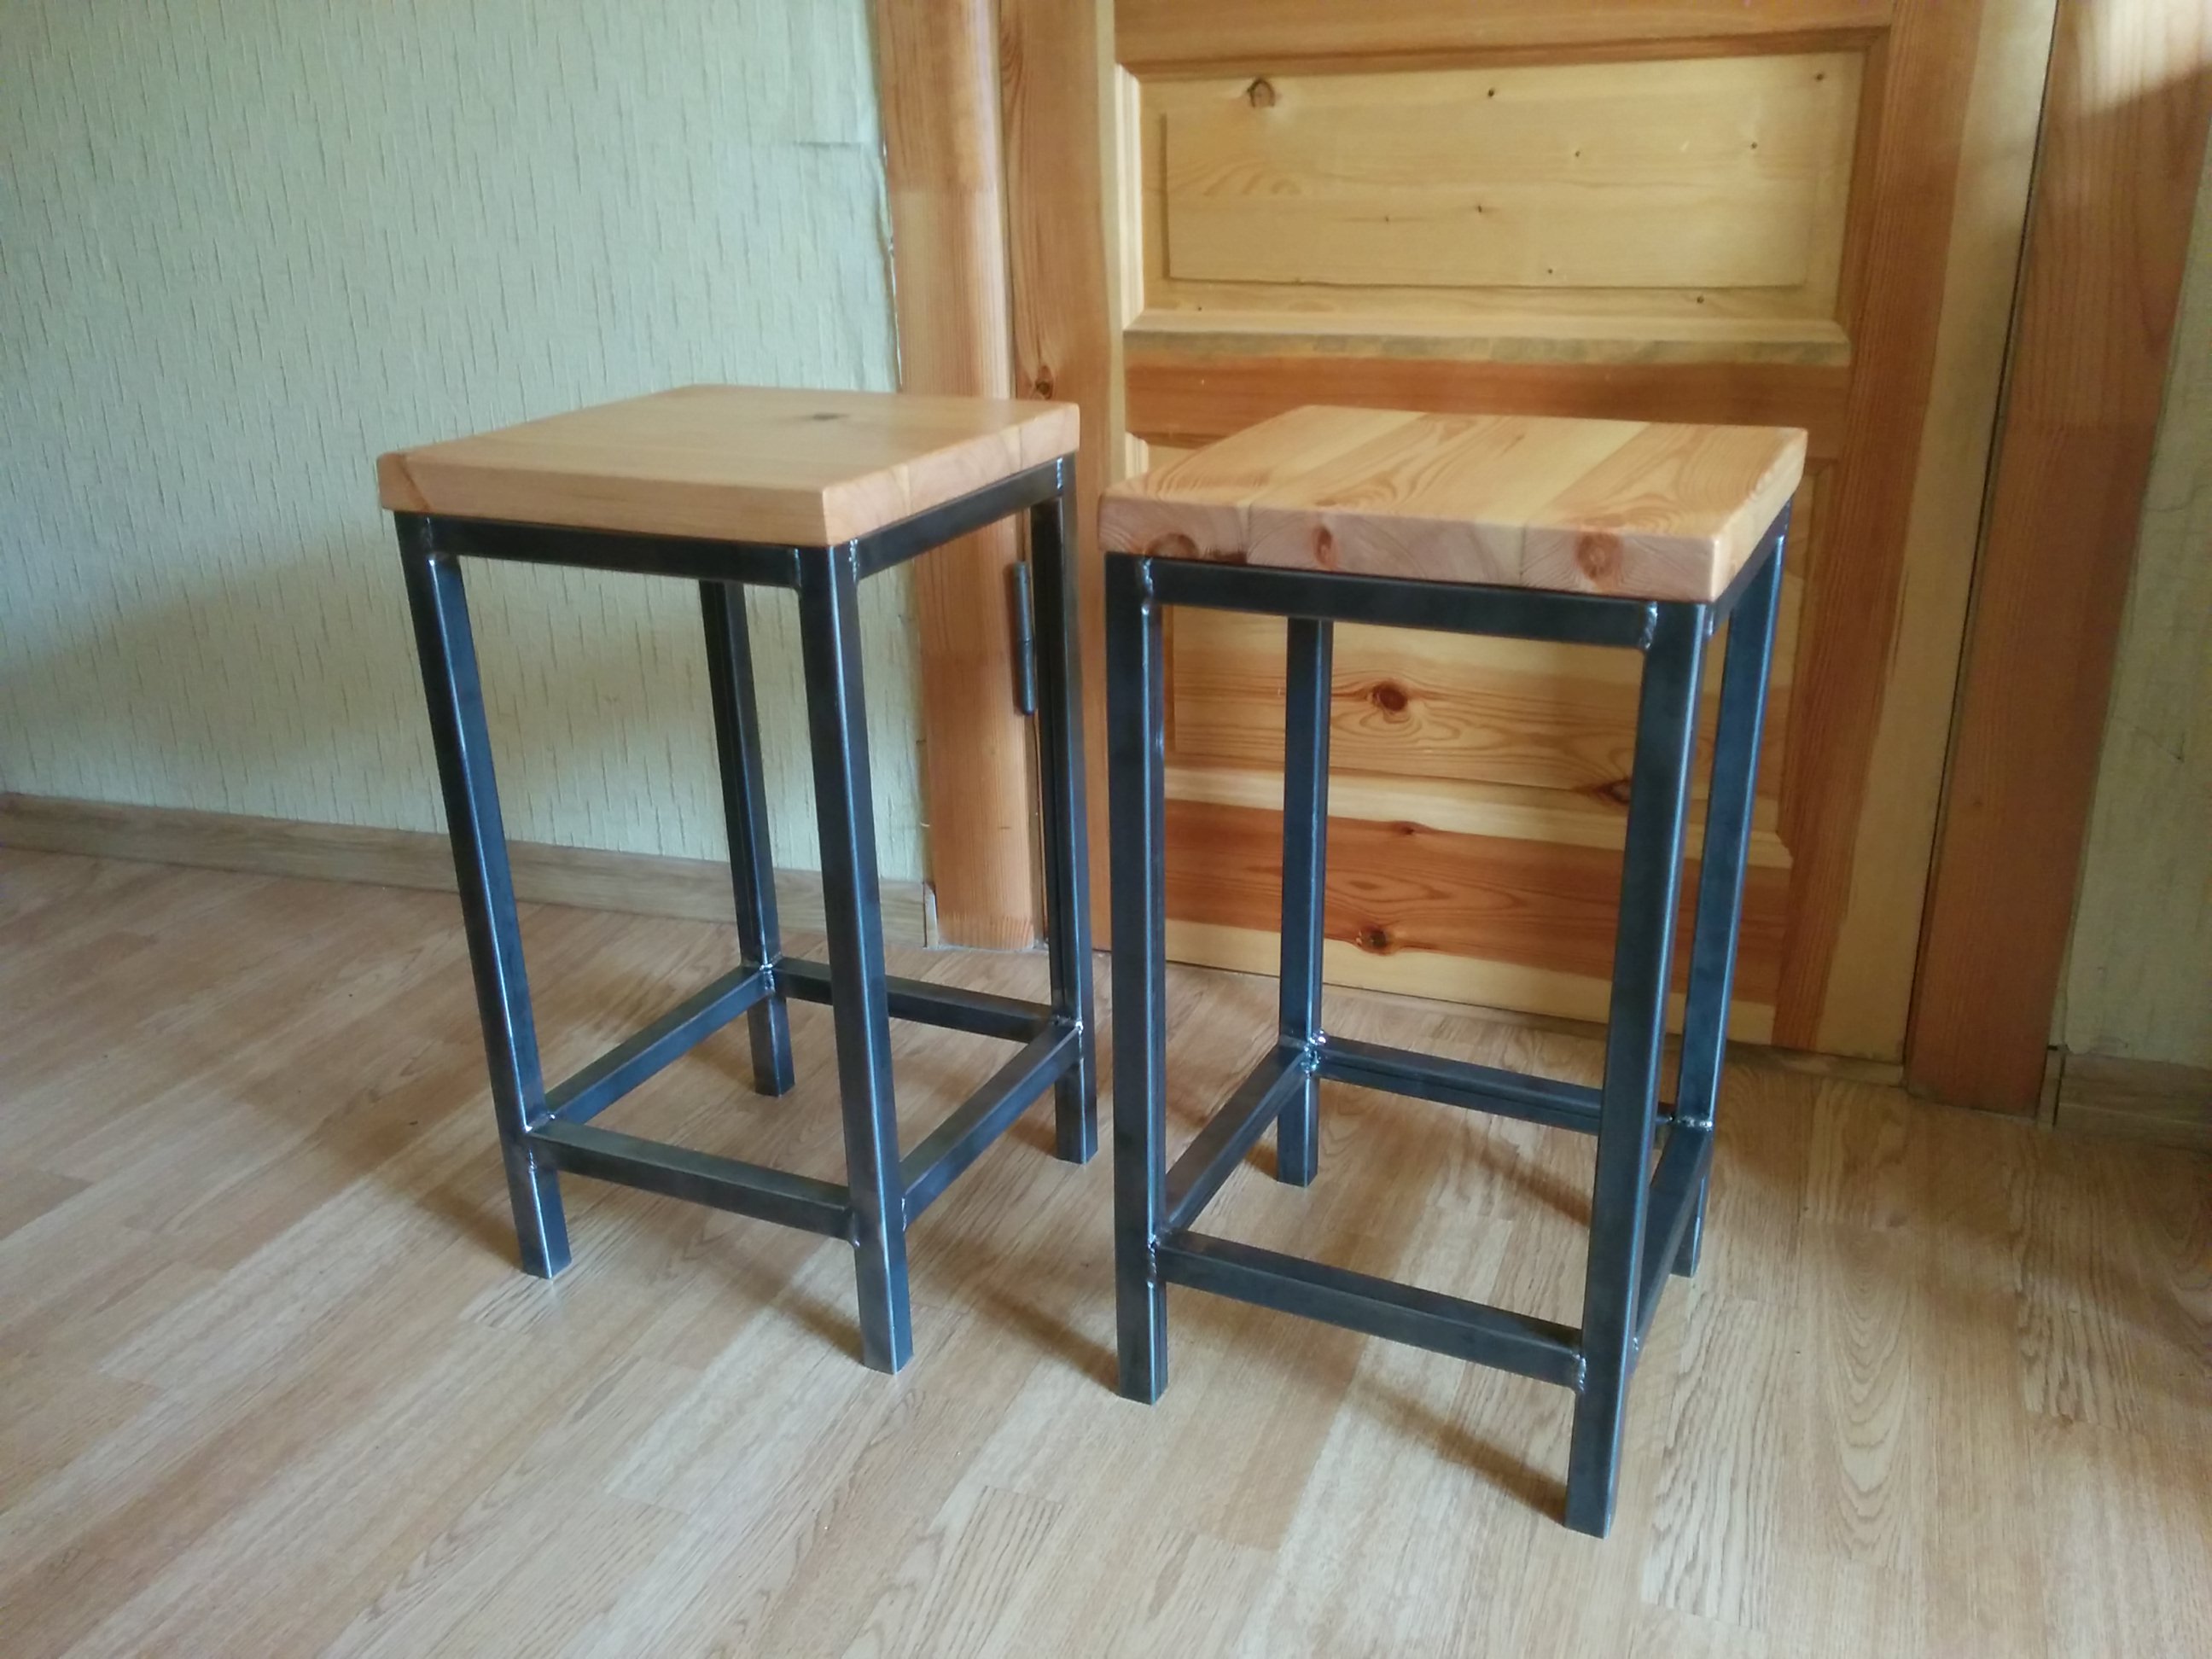
I wanted to make a bit rough looking stools for our apartment. We refinished the old and quirky wooden floor, and after some searching decided this kind of stools would suit the place well.
Cutting the steel

I started by cutting some 25x25mm square tubing.
I cut the steel using an angle grinder and a hack saw.
Cut materials

I chose all the sizes based on the height of the kitchen table in our newly rented apartment. I wanted it to be approximately 56cm (22in) high, and 30cm (12in) wide.
The vertical pieces are 53cm long, horizontal 25cm.
Making a welding jig

To keep everything square I built a simple jig out of an old table top and some some scrap wood.

Welding the first piece

I welded using inverted stick welder with 2.5mm electrodes.
First few pieces welded together

First piece welded.
The welds


I have used stick welder no more than 5 times before, so my welds aren’t the best. Had to grind out and redo some of them, but at the end most of them didn’t look like bird shit, so I call it a success.
Welded and grinded sides

I grinded off excess material from the welds on one side of these pieces (that will be on the inside of the stool), so I can put them back in the jig and connect together.
Welded and grinded sides

Had to make sure they are perpendicular to the jig.


Making the clamps


So to make the top pieces, I needed to glue together some planks.
I didn’t have big enough clamps, and it was getting late, so I couldn’t buy them.
But after a bit of thinking I discovered I did have some leftover square tubing and long peace of threaded rod, so couple of minutes later I had an awesome clamp.
Gluing the wood

So to make the top pieces, I needed to glue together some planks.
I didn’t have big enough clamps, and it was getting late, so I couldn’t buy them.
But after a bit of thinking I discovered I did have some leftover square tubing and long peace of threaded rod, so couple of minutes later I had an awesome clamp.
Top pieces

I left the glue to cure over night, and in the morning cut out the top parts with a jigsaw. They are 306*306mm in size.
Then I sanded them with a random orbital sander.
Applying lacquer

The screws

Fastening the top pieces

I drilled small holes trough the top horizontal tubes, and then widened the bottom hole with a larger drill bit, so the screw hides inside the tube.
Finised!

Height compared to a normal chair

Inserts for the legs

